I
have almost maxed out the number of Florida torreyas (Torreya taxifolia) that can be reasonably planted at my North
Carolina home. Eighteen are now in the ground, mostly along both sides of the
driveway and a few around the edge of the yard. One is from the 2010 seed crop,
five from the 2011 seed crop, and the twelve planted this year from the 2012
seed crop. My previous torrey blog posts document the first six (2010 + 2011) that
were transplanted into the ground in past years, and the present post documents
the last twelve.
All
have 4-foot tall, cylindrical 2x4 wire cages around them for protection from
deer. The following series of photos represents the steps I go through when
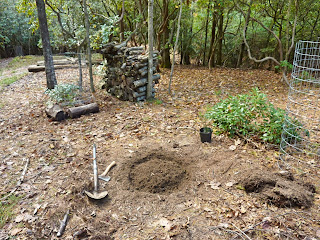
planting Florida torreyas. First, I rake leaf litter away from the chosen spot:
I
then shovel the 2-inch-thick root mat from the ground and set it aside (to the lower
right in the second pic, at the base of the wire cage). Next, I thoroughly chop
up and mix organic fertilizer and dolomitized limestone into the soil with a
shovel to at least the depth of the shovel head:
The
seedling is then transplanted into the prepared ground:
The
wire cage is then placed over the plant and I try to screw it into the soft,
prepared ground. This seats the cage several inches into the dirt, which
enables forest roots over the next year or so to grow through it and fasten it
to the earth. Then, I place long, thin branches through the wire cage to hold additional
fastening materials:
Larger
logs are then placed on top of the branches to weigh down the cage:
Next
comes mulching with local leaf litter:
I
photograph the finished product with a nuance:
Notice
that this last photograph was taken from the perspective of the fifth
horizontal cage wire. The first wire is seated about 2 inches in the ground. Count
the horizontal wires from that invisible first wire to the fifth wire; that distance
represents 5 x 4 inches, or 20 inches. You can see that the seedling is about
two inches below that level, so this photo tells you that this seedling is 20
inches (wire height) minus 2 inches (first wire in the ground) minus 2 inches
(below the fifth wire) equals 16 inches tall. This is a handy way to document
seedling height growth until the cage is removed.
I
re-transplanted the 2010 seedling this year because it was in the way of house
construction. Only a few roots were growing through the cage after one year,
which was disappointing. It apparently will take several years for good root-cage
fastening to occur.


